Outlook - Creating Custom Views using Categories and Mail Merge

Merge from Outlook – Labels or Envelopes
1. Select the contacts you wish to merge.
Tip! To select many contacts at the same time:
If the names are next to one another on the list:
Click on the first name and Shift + click the last.
If the names are not next to one another on the list:
Click on the first name and Ctrl + click each subsequent name.
Ctrl + click also deselects names.
2. Select Home, Mail Merge on the menu bar.
3. Select the following options on the Mail Merge Contacts dialog box:
a. Only selected contacts (unless you want all the visible contacts merged)
b. All contact fields (this doesn’t mean you need to use all contact fields, it just means all of them will be available IF you want to use them).
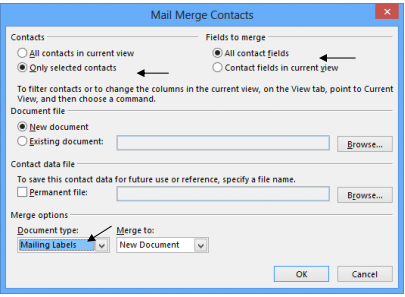
4. Select New Document.
5. Select Document Type: Mailing Labels.
6. Click OK. The following message on the screen.

7. After you click OK, select Setup on the Mail Merge Helper Dialog box.
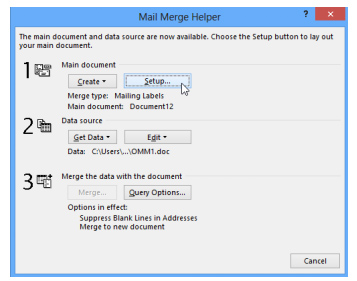
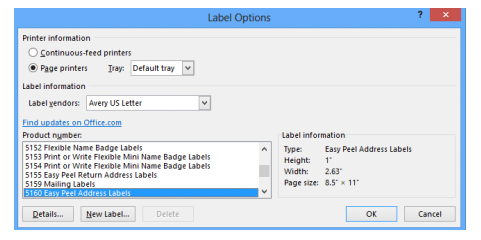
8. Choose the Label vendor, Product Number and whether you want manual or Automatically Select printing or a specific print tray. Click OK.
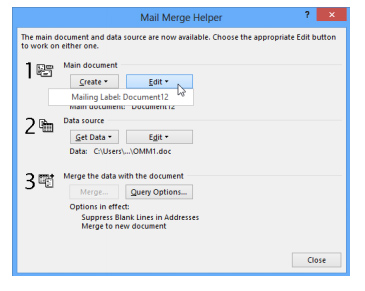
9. Select Edit, Mailing Label
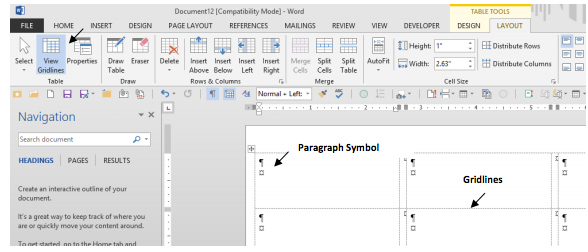
Tip! If you cannot see the layout of your table (because table gridlines are not shown) select View Gridlines on the Table Tools Layout tab.
Tip! Also notice the paragraph symbol in the upper left corner of the first label. Delete the paragraph symbol if you want your label to have more room for text.
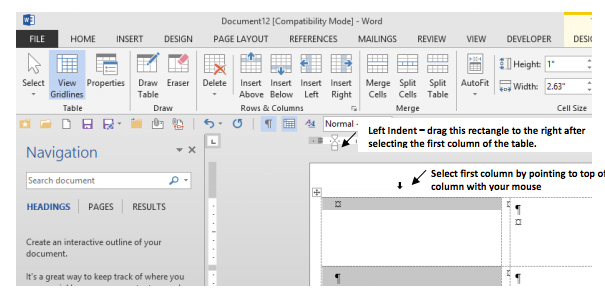
Tip! The first column always prints too far to the left. To prevent this: Select the first column and drag the left indent for the first column only, slightly to the right
10. Select individual fields or the Address Block for the top left label (see Merging letters to insert Fields or Address Block).
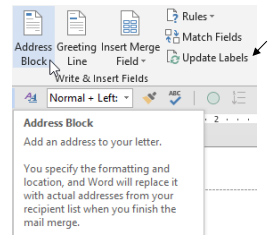
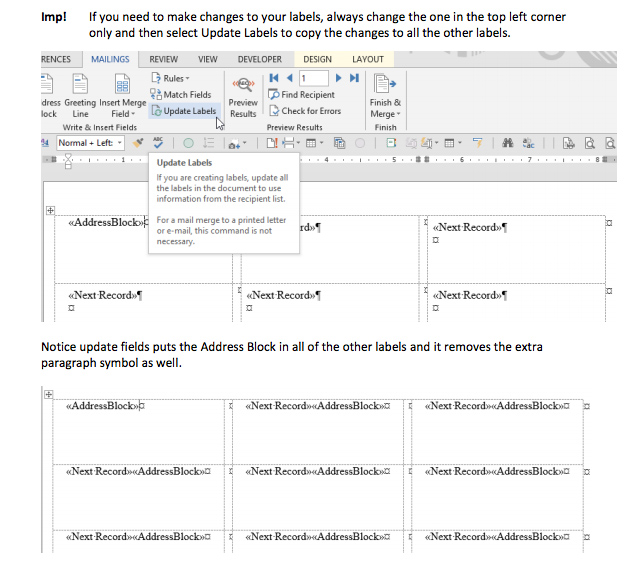
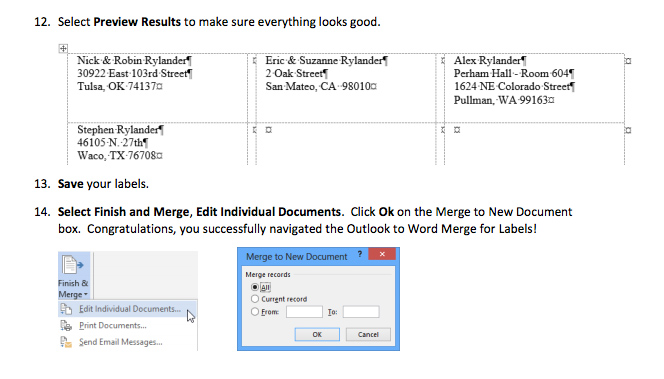
11. When the top left label looks perfect, click update labels to copy those fields to all other labels.
Imp! If you need to make changes to your labels, always change the one in the top left corner only and then select Update Labels to copy the changes to all the other labels.
